
RESIDENTIAL BUNGALOW

Living room as it was.
Tasked with taking a nice but drab residential bungalow and a very fixed budget where paint and imagination were to be my essential tools, I brought colour and new life to a house.
The pale pink colour of the living and dining rooms did nothing to bring out the wonderful size of the rooms and the log cabin hardwood floor.
The dated brown brick of the fireplace also had to be remedied.

I chose a warm Terra Cotta tone for the living and dining rooms, brightened up the baseboards with white and resurfaced the fireplace with matte plaster.
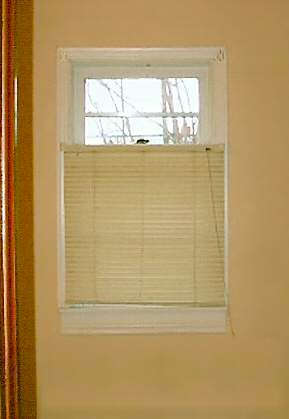
I left the stained trim around the windows unpainted to tie it in with the tone of the hardwood floor.
This wonderful log cabin pattern is repeated throughout the home.
The bathroom was a horrible pale peach colour with an aqua countertop.
The window, which was required to provide privacy and at the same time allow light in, I chose to paint with a frosted glass paint.

First, I painted the bathroom slate green.

Then, I removed the sliding portion of the window as well as the glass from the fixed portion. I printed the stain glass pattern the same size as the window (not the glass, the entire window) and planed it under the glass.
All I had to do then ...

... was first outline the pattern with the black lead paint. Once that dried (24 hours) ...

... I filled in the section with the appropriate colours and frosted the open spaces of the glass.

The beautiful delicate leaf pattern, and one whimsical butterfly, accomplish this wonderfully well.
Since the bathroom window turned out so nicely, I decided to tackle the back door next.

Using the same method, I did a stained glass insert for the back door. I left a large oval clear to be able to view out the back door.

It took no small effort to get the YEARS of coats of paint off the wooden door. After sanding and filling the door, I gave it three coats of pale yellow paint and new brass hardware.

It looks darn good!

Now, a new storm door to go with the refurbished back door is in order, lol

The front step before were plain and parallel to the front porch. I angled them, gave them a wonderful slate grew and celestial yellow paint job and added a stone planter with tiger lilies.
Small changes that made a big difference.
DREAMING OF A RENOVATION
If I were able to effect bigger changes to this home (it does need a new veranda for it's back yard) the designer in me couldn't resist developing a renovation if money were no object.

So, I sat at my computer with my 3D Architect program, and designed an affordable veranda (not pictured here). Then creativity set in, lol

The back door has been removed and sided over. The kitchen and bathroom windows remain.
The multi-level patio would make for enjoyable family living and entertaining. The sliding doors lead to a screen sun room that allows cool summer breezes to flow through an into the dining area and it can be glassed in and heated for the winter time.
I think it's an excellent design. I wanted to separate the upper from lower patios with a stone planter, but there's no way to draw that with the software I have.
The kitchen inside has also been redesigned.

Knocking out the wall between the living and dining rooms, as well as the wall between the dining room and kitchen, adding sliding glass doors to a sun room and a Fench door to a back porch, I increased the work surface and cupboard storage in the kitchen by more than 100%.
The eat-at raised counter can be either a breakfast bar for kids and family or serve drinks and eats for entertaining on special occasions.
NEVER leave a Designer bored, with ANYTHING, lol
COMMERCIAL REDESIGN
Unlike the residential sprucing up, this commercial property had a budget of a much larger scale.
Before, it was nothing short of a nightmare:

Using my computer, and no shortage of imagination, I redesigned the building first from this side:

and then, from the front:

And then, with probably more optimism than sense, we tore the roof off the building in February month in Newfoundland, lol
The store HAD to be fully renovated and ready to be open for the spring bridal season or I'd be sunk. It was nerve-racking and stressful, but as the renovation began to take shape ...

... and I could begin to see what would be my new sewing loft on the second floor, it was less stressful and in fact, exciting.
(Unfortunately, before the renovation was fully completed, my 35mm camera was stolen by those to whom I don't wish any good luck, I'm sure you agree.)
This is the actual building AFTER the renovations were completed:

This is what I achieved using a simple 3D home software program and basic graphic design software. Imagine what I could accomplish with proper programs, lol
The display window was added several years after the initial redesign.

I even designed the sign using basic design software and there's the bride logo I mentioned earlier.
I'm quite proud of this project and hope to be able to flex my architectural design muscles again in the future.
OTHER ARCHITECTURAL DESIGNS
I do have other building projects, but they are of a much smaller scale, lol
This miniature 1/2" scale replica of my own log cabin hardwood floors is for a miniature house I'm building as a hobby.
This is the living and dining rooms of my miniature 3 story Victorian. The are separated by a double-faced fire place.

This is the second floor, the opening is a stairwell, the non-wood surfaces are the little miniature bathrooms.

The green wires run under the tiny floor boards and come out in the ceilings of the first floor to be wired into miniature fixtures.
No comments:
Post a Comment